
The goal of Full Site Editing themes is to enable users to customize their themes exclusively in the editor. Previously, we used Footer widget areas and Customizer options to edit our Footers. In block themes, we have Footer Template Parts that are built entirely with blocks.
Block theme creators can provide multiple pre-designed Footers in a theme. Users can then select a Footer and customize their content directly in the Site Editor.
Theme users can also choose different Footers on their Page Templates. For example, you can use a different footer on your blog than on your home page. These are much more flexible Page building options compared to what we were used to in classic themes.
Currently, we have only a few Footer designs included in our Aino theme. We will add further Footer templates later on.
Footers in the new Site Editor
To customize the multiple Footer Template Parts of a block theme, click on the Site Editor. In the upper left corner click on the Logo/WordPress Toggle Navigation button to open the Site Editor menu. You can navigate to Template Parts and Template Parts ‘Footers’. Here you can customize the Footer templates.
Customize Footer content
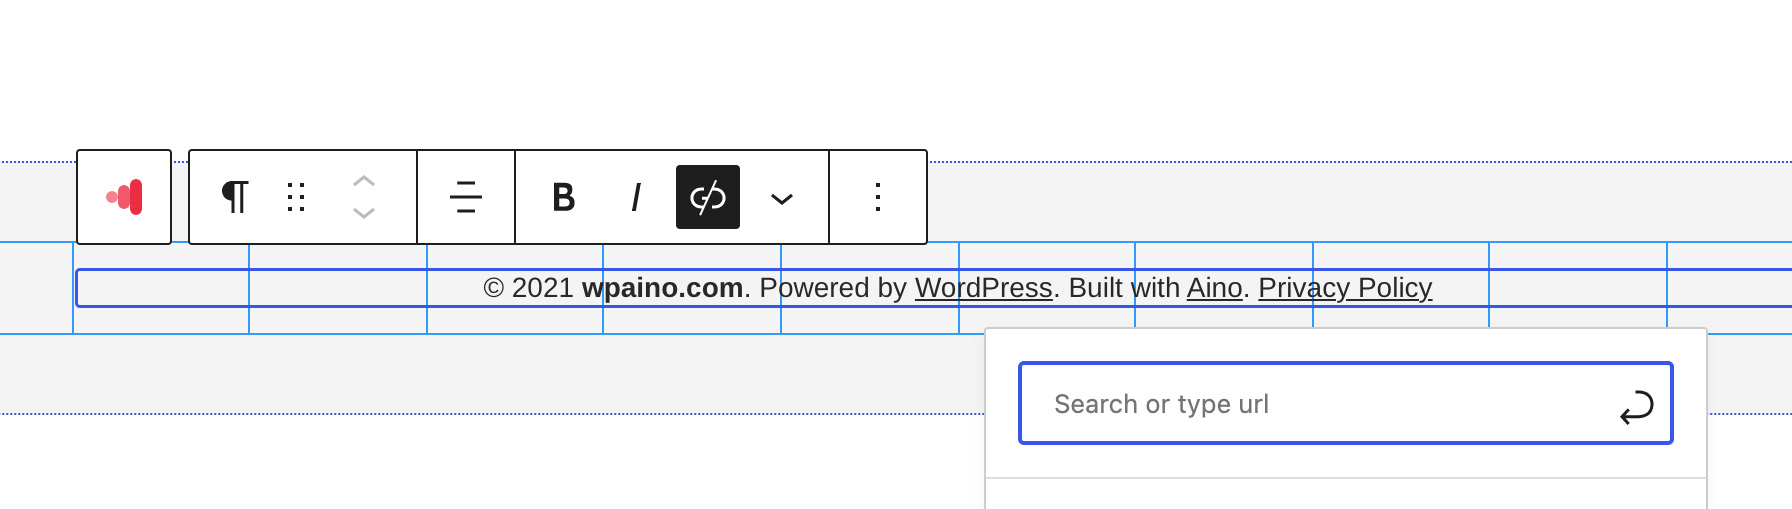
At the moment it is still necessary to enter your page title in the Footer text. We will update the footer when there is a better option available. Additionally, you could use the Footer text bar to add text links to your Imprint and Privacy policy page.
When you want to have a bigger Footer with multiple columns you can use the Footer ‘Five Columns’ (Dark or Light).
You can either choose an existing Navigation menu (in case you have existing menus from your classic theme). Or you can create a new menu. Please note that there is currently no support for existing menus with submenus. In this case, it’s best to create a new menu.
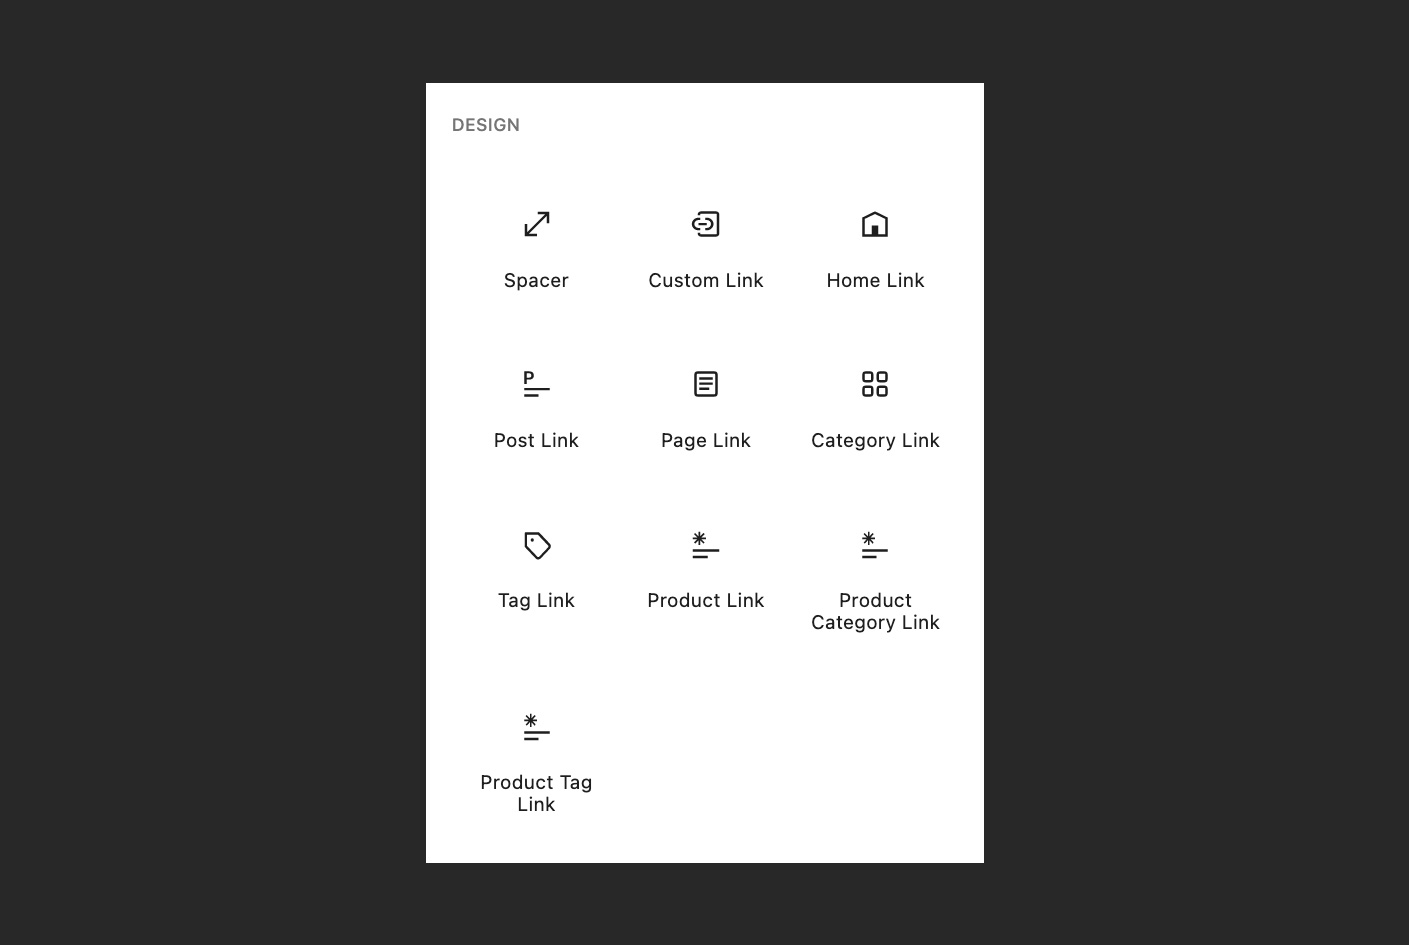
Next to page links, you can also link to your categories, tags, posts, WooCommerce products or WooCommerce product categories. Blocks for all these elements are available.
You can also select the Footer group block we added around a Footer menu and Footer title, then duplicate it and insert a second Footer element below. To increase the spacing of the footer lists, you can add Aino’s responsive spacing.

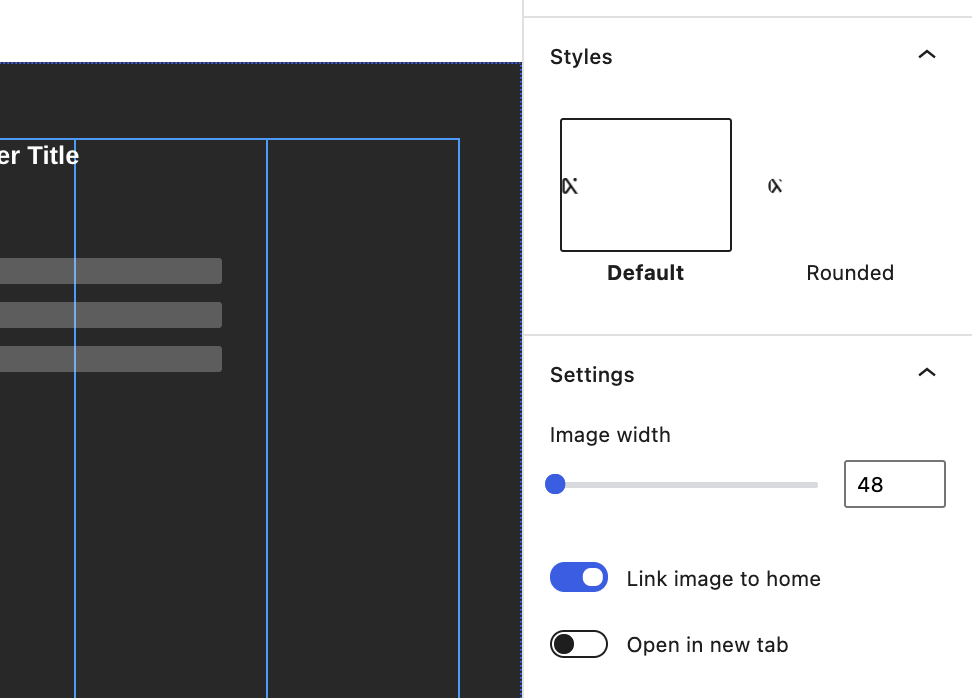
If you have a website logo, you can insert it in the first footer column. It’s best to double the size of your logo image (i.e. 96 pixels for a 48 pixels logo). You can specify the image width in the blog settings.
Choose Footers for your Page Templates
To select a Footer for one of your Page Templates, navigate to the respective Page Template in the Site Editor menu. On the Page Template editor view, click on the Footer. Now you will see the ‘Replace’ button in the editor toolbar. When you click on ‘Replace’ the alternative Footer Template Parts are shown in a preview and you can choose one by clicking on it.
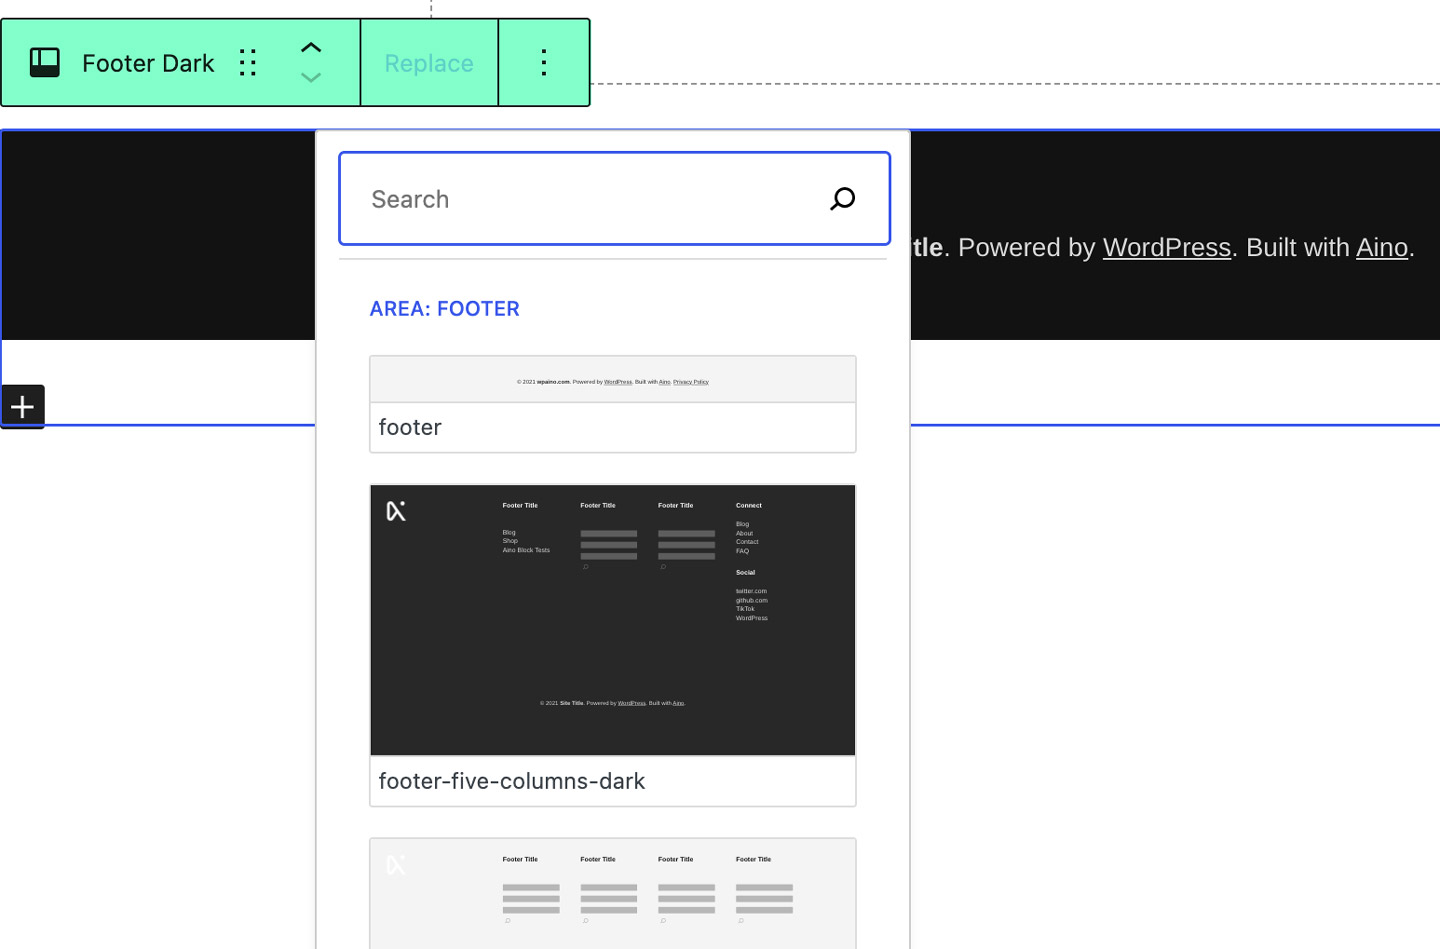
The advantage here is that you can choose different Footers for your Page Templates. Once we have prepared a few more Footer template parts to choose from, this option will become more exciting. It’s an exciting new feature though since you can use different Footer colors or customize the Footer content according to your Page Template’s content. Don’t forget to apply your Footers to the General Page Templates as well (under Templates/General Templates in Site Editor).
Feedback and questions
The new FSE Footer and Header options in block themes are a big change and it’s a bit of a learning curve. Please let me know if you have any questions or if something isn’t quite working out for you yet. Block themes are also still in their early stages, so the workflow will improve in future updates.
How do you like the new options that Site Editor and Block themes bring? What footer designs and footer elements would be helpful for your website? Please write us a comment below, we’d love to hear from you.
Leave a Reply